

Update: The Windows 10 Anniversary Update (1607) removed the ability to disable the lock screen on Windows 10 Pro editions sadly, this tutorial will still work for enterprise versions of Windows 10, however not on Pro editions if you have updated past Windows 10 1511, released in November 2015.
The Windows 10 lock screen makes sense on tablet / mobile devices, however on a desktop PC or laptop the lock screen is just an extra click every time you wish to use your device. Thankfully the Windows 10 lock screen can be disabled quite easily.
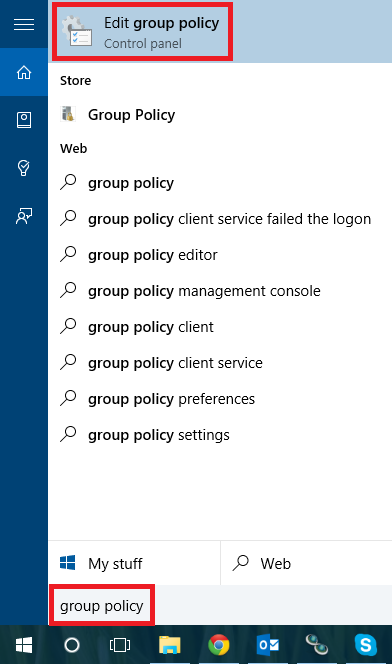
To disable the lock screen on Windows 10 press the start button and search for “edit group policy”, then click on edit group policy to bring up the local group policy editor:
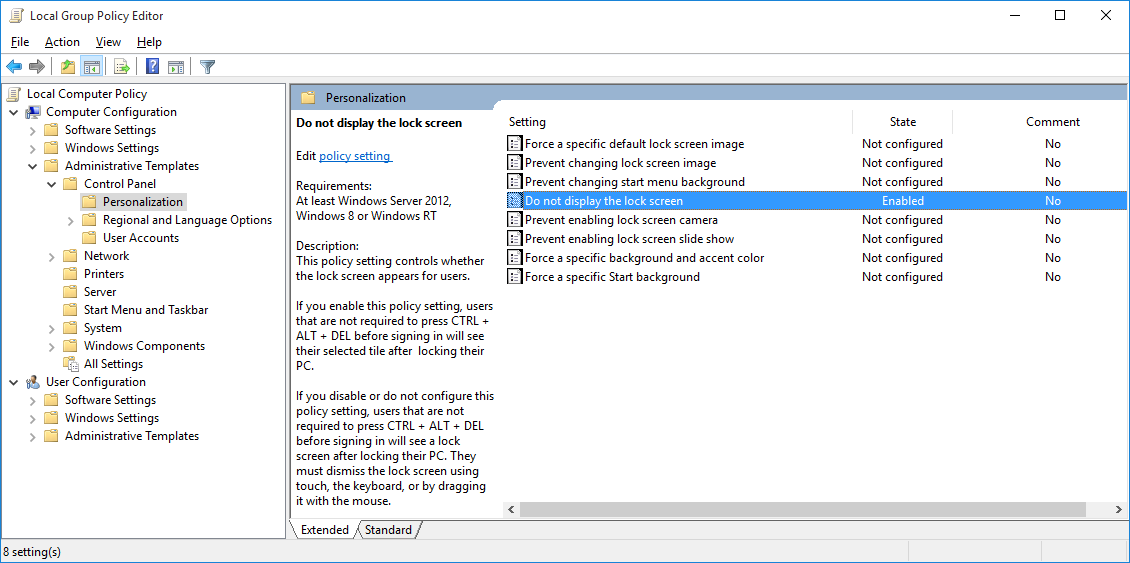
Once you have the local group policy editor loaded up navigate down to thew following:
Computer Configuration > Administrative Templates > Control Panel > Personalization, then double click on “Do not display the lock screen”
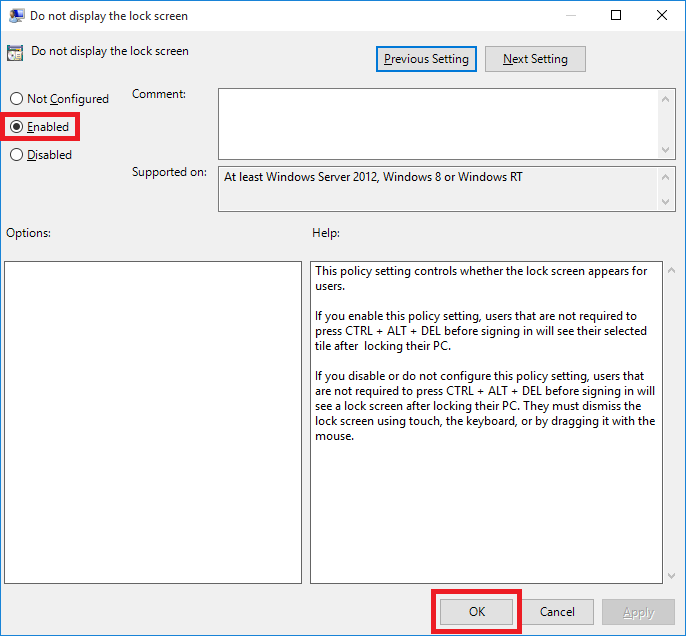
On the left menu select “Enabled” then click ok.
Thats it, you no longer have a lock screen on your device. Press the Windows Key + L to lock your device, you will now see you are prompted to unlock the device right away, instead of having to click or press a key to make the lock screen go away.
I hope someone finds this useful, easy to do, once you know how!